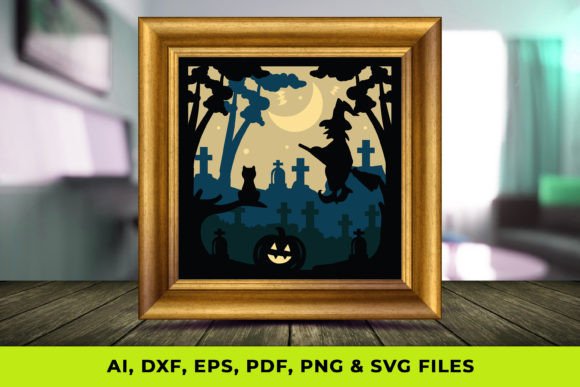
Choosing the Right 3D Witch Shadow Box SVG for Your Halloween Decor Projects
As the autumn season approaches, crafters and DIY enthusiasts begin searching for ways to elevate their home decor beyond standard flat signs and window clings. Among the trending options is the 3D Witch Shadow Box SVG, a digital file format designed to create layered, dimensional artwork. Unlike traditional two-dimensional cut files, these designs utilize multiple layers of material—typically cardstock, vinyl, or wood—to build depth, casting actual shadows that enhance the spooky aesthetic. For adults evaluating project ideas, understanding the distinct mechanics, material requirements, and design potential of this specific file type is essential before committing time and resources.
Defining the 3D Witch Shadow Box Format
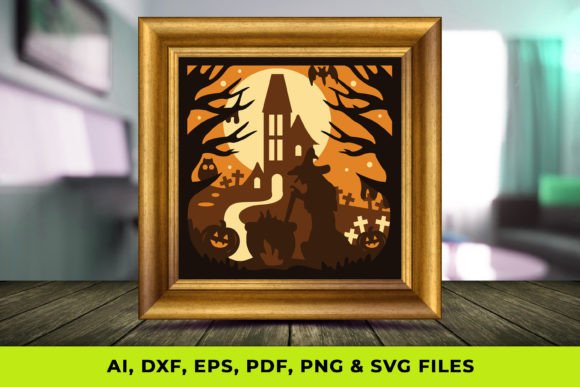
A 3D Witch Shadow Box SVG is not merely an image of a witch; it is a engineered set of vector paths intended for layering. When you purchase or download such a file, you typically receive a suite of formats including SVG, PNG, PDF, AI, EPS, and DXF. Each format serves a specific function in the crafting ecosystem. The SVG (Scalable Vector Graphics) is the primary workhorse for cutting machines like Cricut or Silhouette, allowing for precise cuts without pixelation. The DXF is often preferred by users of older software or laser cutters, while PDF and PNG serve as visual references or printing guides.
What makes this approach distinct is the reliance on z-axis depth. A standard witch silhouette is flat. In contrast, a shadow box design separates the witch's hat, face, hair, background elements (like moons or bats), and the frame into individual layers. When assembled with foam adhesive tabs or spacers between them, light interacts with the gaps, creating genuine shadows that change depending on the viewing angle and ambient lighting. This transforms a static image into a dynamic piece of art that captures the eerie atmosphere of Halloween more effectively than flat decals.
Comparative Analysis: 3D Layers vs. Traditional Flat Designs
When deciding between a 3D shadow box project and a traditional flat design, several factors come into play regarding effort, cost, and visual impact.
- Visual Depth: Flat SVGs rely entirely on color contrast and intricate internal cut details (negative space) to create interest. While effective from a distance, they can look somewhat one-dimensional up close. A 3D Witch Shadow Box SVG offers tangible depth. The separation of layers creates a "pop-out" effect that flat designs simply cannot replicate, making it superior for focal points in a room.
- Material Consumption: This is a critical trade-off. A flat design might require a single 12x12 inch sheet of cardstock. A 3D shadow box often requires five to ten sheets of varying colors to complete one unit. If you are working with premium materials like specialty metallic cardstock or veneer wood, the cost per project increases significantly with the 3D approach.
- Assembly Time: Flat projects are generally "weed and apply" or "cut and glue." They are quick. Constructing a shadow box requires patience. You must align multiple layers precisely, apply spacers consistently to maintain even depth, and ensure the structural integrity of the frame. For a crafter with limited weekend time, a flat SVG may be the more pragmatic choice.
- Durability and Display: Flat vinyl decals are prone to peeling over time or damage during cleaning. A shadow box, once encased in a deep-frame box or constructed with rigid cardstock layers, is more protected from dust and physical contact, often lasting through multiple holiday seasons if stored correctly.
Evaluating File Formats and Compatibility
The utility of a 3D Witch Shadow Box SVG package depends heavily on the tools you already own. Professional advisors recommend verifying file compatibility before downloading. If you use a browser-based cutter like the Cricut Joy or Maker, the SVG format is non-negotiable for retaining layer data. However, if you are utilizing a laser cutter for wood or acrylic projects, the DXF or AI files included in the bundle are often superior. Laser software sometimes interprets SVG nodes differently, leading to slight jaggedness in curves; DXF files tend to offer cleaner paths for industrial-grade cutting.
Furthermore, the inclusion of PDF and PNG files adds value for those who may not own a cutting machine. The PNG can be printed directly onto high-quality photo paper and mounted manually, though this sacrifices the crisp edges of a die-cut. The PDF often serves as a template for hand-cutting, although attempting to hand-cut a complex 3D witch design with dozens of tiny layers is generally discouraged due to the precision required.
Ideal Use Cases and Limitations
Knowing when to deploy a 3D Witch Shadow Box SVG versus other decor options is key to a successful project outcome.
Best-Fit Scenarios
This format shines when you need a statement piece. It is ideal for:
- Entryway Displays: The depth catches the eye immediately as guests enter, setting a thematic tone.
- Mantel Decor: Shadows cast by candlelight or string lights interact beautifully with the layered witch design, enhancing the spooky ambiance.
- Gift Giving: A handmade shadow box feels more substantial and "finished" than a flat ornament, making it a higher-perceived-value gift.
- Photography Backdrops: For social media content creators, the texture and depth provide a more professional background than a flat wall decal.
When to Consider Alternatives
There are situations where a 3D shadow box might not be the optimal solution. If you are decorating large surface areas, such as covering an entire window or creating a long banner, the material cost and assembly time of 3D layers become prohibitive. In these cases, a standard flat vinyl SVG or a heat-transfer vinyl (HTV) design is more efficient. Additionally, if you are crafting with young children, the small parts and precise alignment required for shadow boxes pose a frustration risk; simpler, single-layer stencils or coloring pages derived from the PNG files would be more age-appropriate.
Practical Tips for Execution
To maximize the potential of your 3D Witch Shadow Box SVG, consider the following practical adjustments during the creation process:
Layer Spacing: The magic of the shadow box lies in the spacing. Using uniform 1mm foam tape is common, but varying the depth can create a more dramatic effect. For instance, placing the witch's hat further forward than her face can create a looming sensation. Experiment with spacer thicknesses between 2mm and 5mm depending on the size of your frame.
Color Theory: Because shadows are a core component of this design, color selection is vital. High-contrast combinations work best. A black witch silhouette against a deep purple or orange background creates sharp definition. Avoid using similar shades for adjacent layers, as the shadow effect will be lost, making the piece look muddy rather than dimensional.
Lighting Integration: Many crafters overlook the lighting element. A 3D Witch Shadow Box SVG is designed to interact with light. Consider installing a small LED strip along the inner rim of your shadow box frame. This backlighting or side-lighting accentuates the layers and makes the shadows dance, turning a static craft into an illuminated feature.
Making the Final Decision
Ultimately, choosing a 3D Witch Shadow Box SVG is a decision to prioritize visual impact and tactile quality over speed and economy. It is a format suited for the intermediate to advanced crafter who enjoys the assembly process as much as the cutting. If your goal is to create a heirloom-quality piece that stands out in a sea of mass-produced plastic decorations, the investment in time and materials for a layered shadow box is justified. However, if your objective is rapid decoration or covering large surfaces, sticking to traditional flat SVGs remains the most logical path. By weighing these trade-offs, you can select the right resource to bring your Halloween vision to life with precision and style.